The Devourer’s Pit
One boss. Three cycles. Clear tactics.
The Devourer's
Pit
Grathmok · Master Trial · Guild Guide v0.1
PREVIEW SERVER · 13 NOV 202610 PLAYERSFive essential combat rules
- Avoid being knocked off: watch AoEs and open vents.
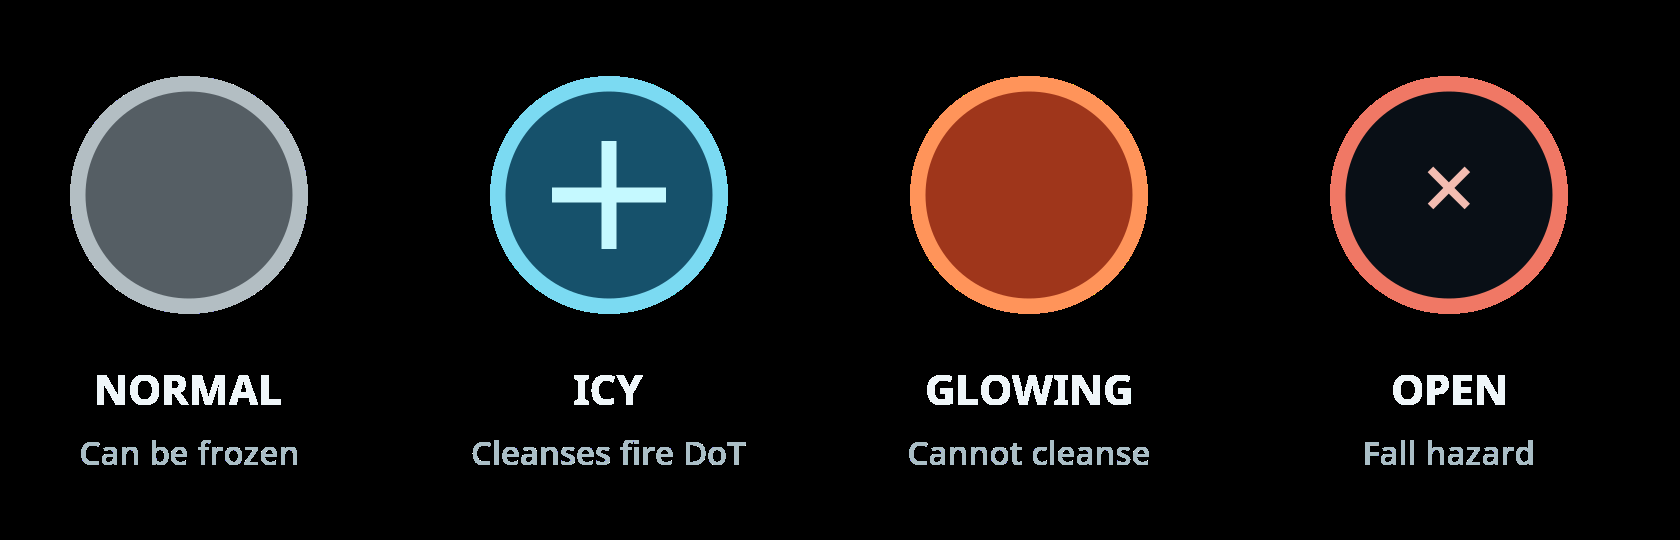
- Hold a default position between vent covers; cleanse fire DoT on an icy vent.
- Swap aggro immediately after a single-target tankbuster.
- Position Grathmok exactly in the center before the healers throw their potions.
- After the knockdown, avoid crossing the middle; destroy the outer locks.
Scope and sources
An initial strategy draft for guild coordination and practice. The main source is the German-language preview video by Pekons (31 October 2026), including the complete transcript provided for this guide.
The official preview and a second mechanics guide were used for cross-checking.
Labels: Shown in video = demonstrated or explained in the preview; To test = hypothesis or not yet reliably verified.
Note: This is not a reliable frame-by-frame video analysis. All arena diagrams are schematic and not to scale.
One boss, three almost identical cycles
The core rotation is unchanged. Transitions and Madness stacks in phase 3 increase the challenge.
Phase 1 · Fundamentals
Recognize boss attacks, manage vents, cleanse DoT, swap tanks properly and survive the Hypo soak.
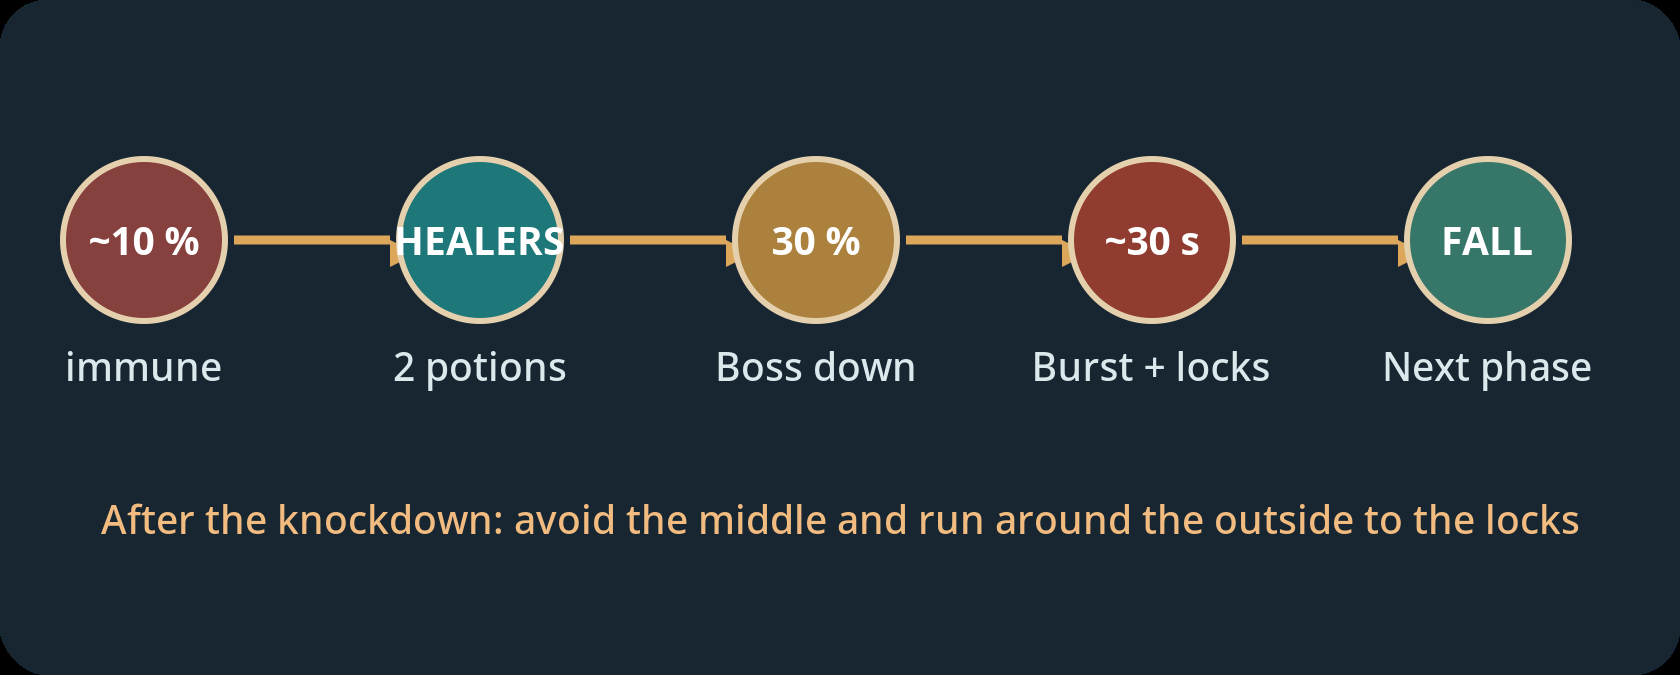
~10 % The boss becomes immune and the transition begins.
Phase 2 · Repeat
The same attack pattern, followed by potions, a DPS check, outer locks and the tanks' protection channel.
No further consistent difference can be established from the preview.
Phase 3 · Madness
The familiar rotation plus additional purple Madness stacks. The 16th stack is lethal.
The source of the stacks and the best counterplay are still unconfirmed.
The same principle in every cycle
Recurring rotation of boss AoEs, tankbusters, vent changes, fire DoT and Hypo soak. At about 10% HP move the boss to the center and trigger the healer mechanic. Then there are approximately 30 seconds for boss damage and outer locks. Next, the tanks hold their special protection ability during the red arena wave, while healers keep everyone alive.
The vents are the key mechanic
Stand safely, cleanse deliberately and never underestimate an opening cover.
Default positioning
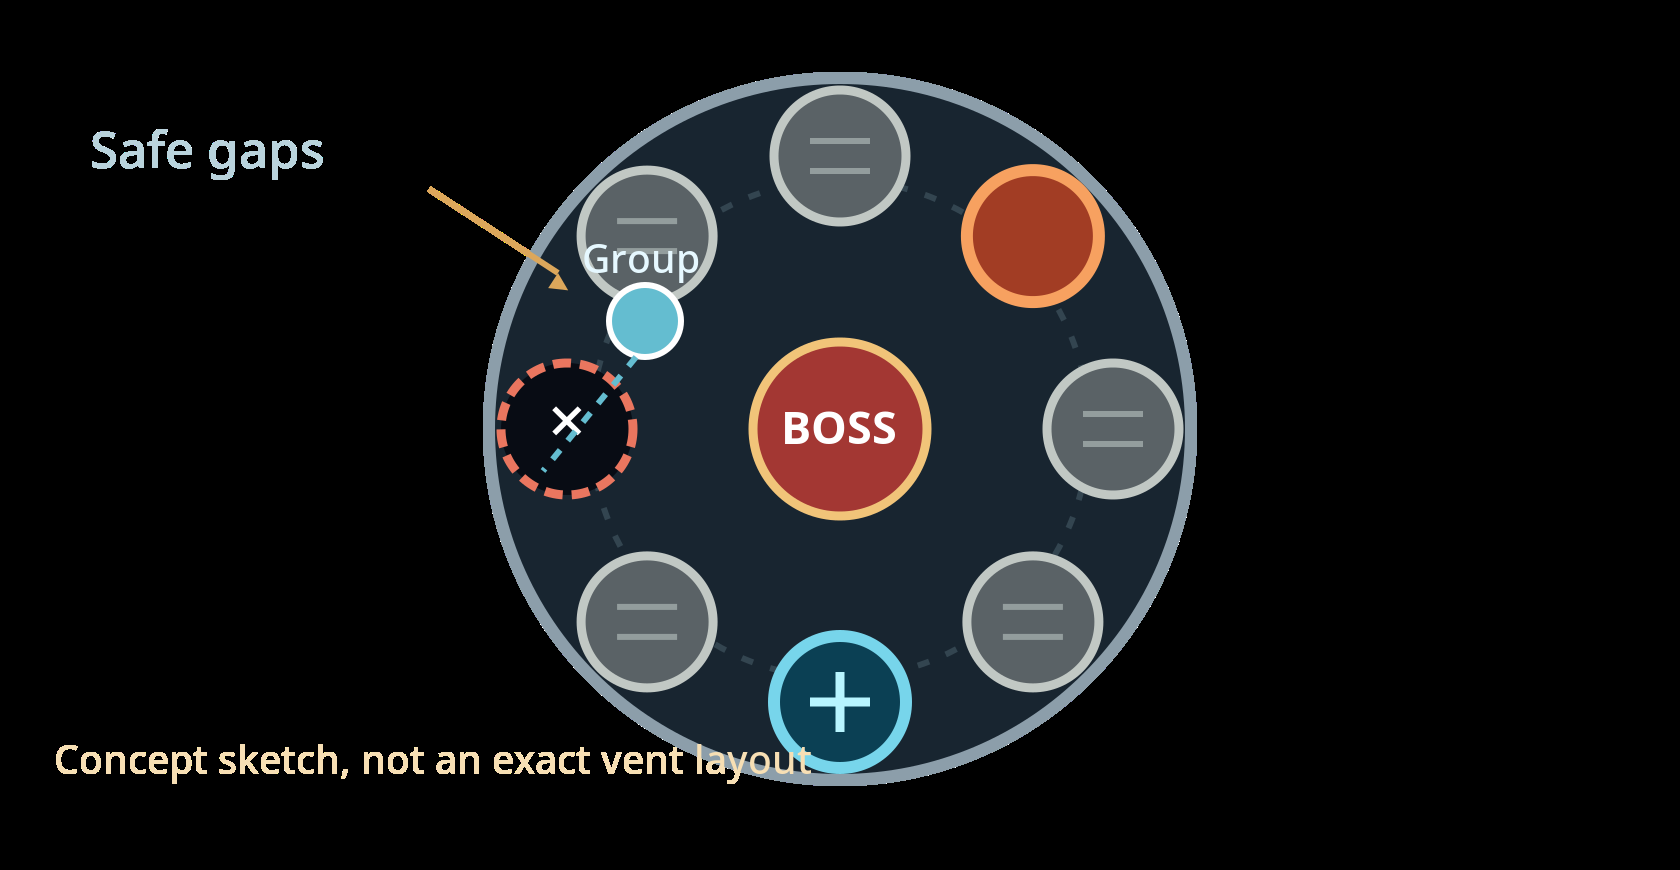
The group should stand between the vents whenever possible. This helps avoid explosions and some opening patterns without constantly crossing the arena.
Boss claps three times
Several covers then open, exposing lethal drops. In the preview, the cover directly beneath the boss never opens. Smoke indicates a cover is about to open.
Guild callouts
"Vents!" – Hold the gap between vents; check for smoke and open holes. "Cleanse!" – Step onto an icy cover, or freeze a normal cover by stepping on it. "Hypo on ice!" – Move to the agreed safe vent for the group soak.
Recognize the most dangerous telegraphs
Many attacks are especially dangerous because their knockback can throw players off the platform.
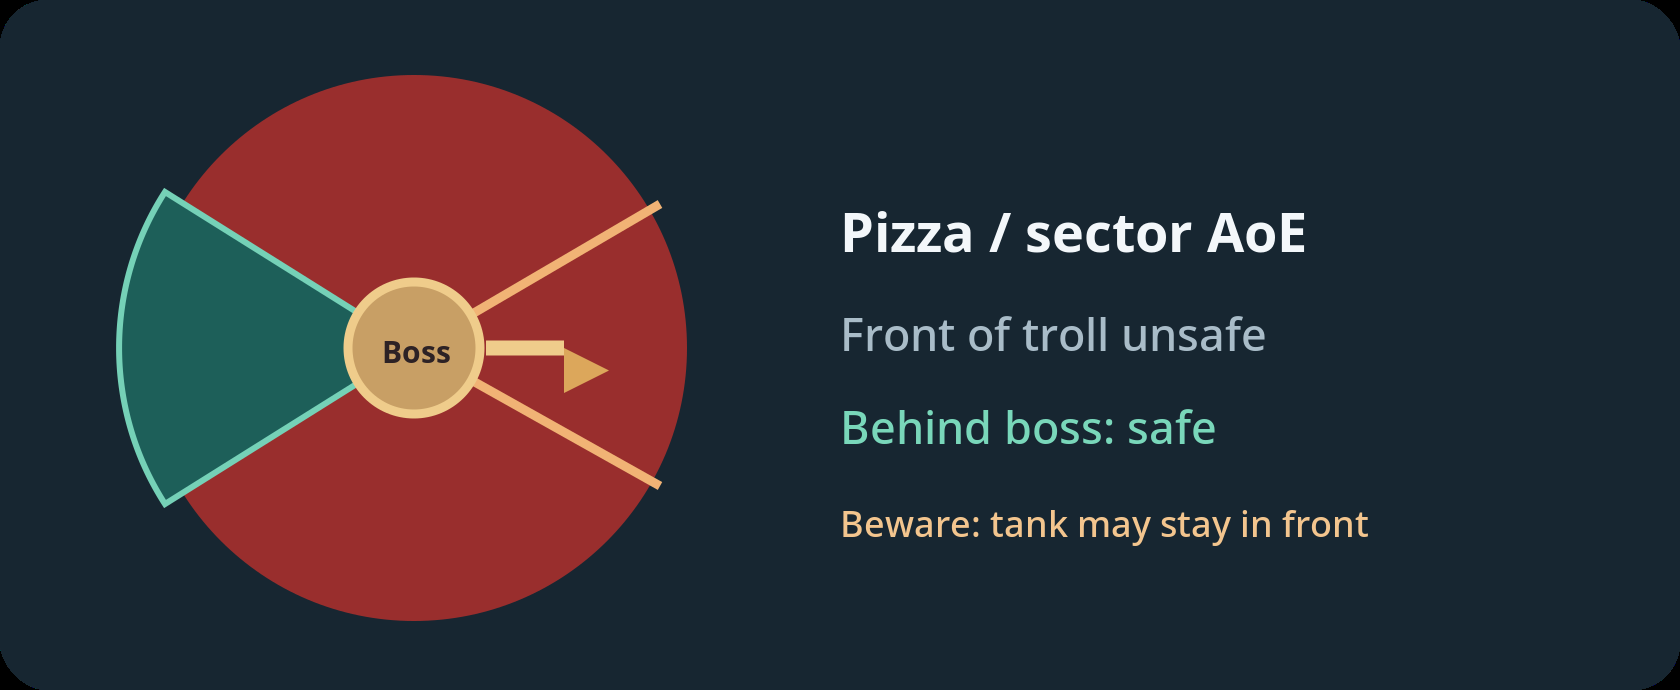
| Attack | Telegraph / response |
|---|---|
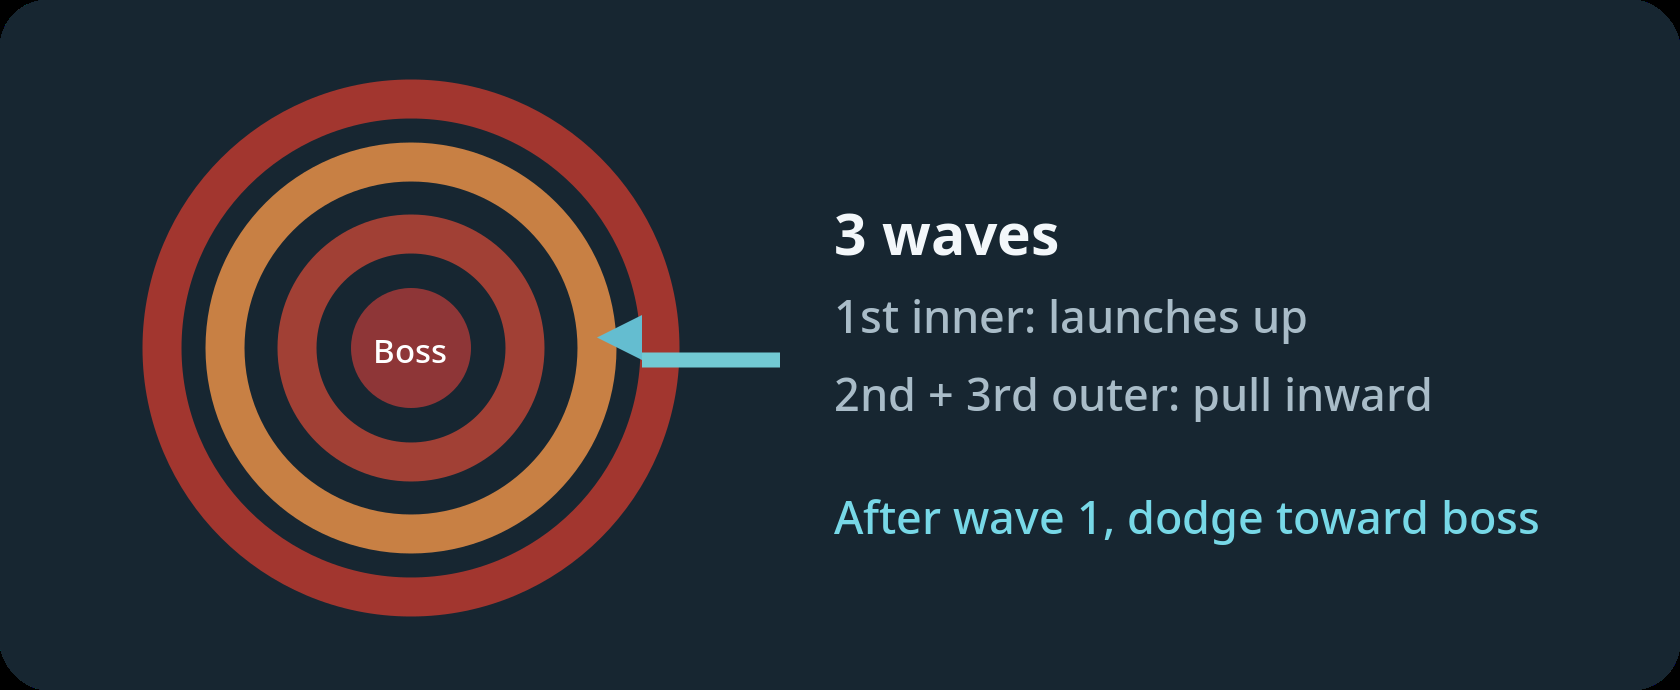
| Shockwave 00:28 | Three rings: inner ring launches; outer rings pull inward. Dodge toward the boss after ring 1. |
| Tank-targeted leap 00:49 | Large red circle. The hit lands only after the boss lands and the red area disappears; do not run back too soon. |
| Line AoE 01:03 | Long red line aimed at the aggro tank; knockback. Leave the line. |
| Fist / cone 01:12 | Fast frontal cone with knockback. Stay behind or to the side. |
| Meteors 01:29 | Multiple small red circles; move out. |
| Kick 01:40 | Targets the aggro tank; small knockback. Keep clear of the edge. |
| Pizza 01:47 | Dangerous frontal sectors; behind the troll is safe. |
| Vent AoE 01:59 | Charging red circles above vents; remain between vents. |
Tankbusters and Hypo decide the run
Clean aggro swaps, a predefined gathering point and coordinated mitigation are crucial.
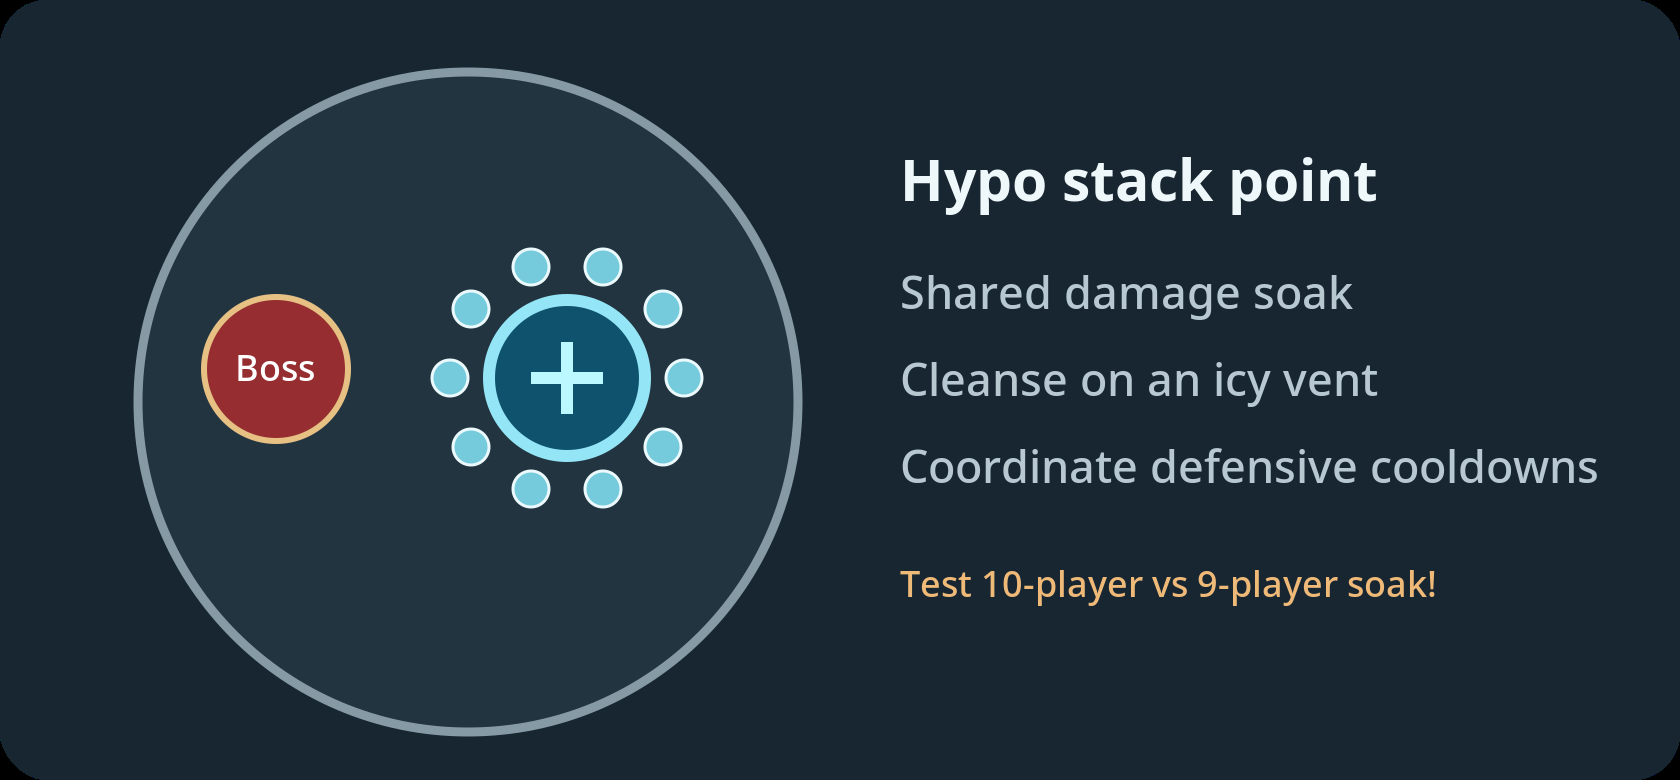
Hypo callout
"Hypo – icy vent – mitigation 1 – stack!" Apply healing and shields before impact, not afterwards.
Single tankbuster
Extremely heavy single-target damage. The tank who was hit must not take the next one: swap aggro immediately after the hit. Tanks rotate their defensive cooldowns.
Double tankbuster
Both tanks receive their own marker. Both must survive and position so that the group avoids collateral hits.
Single and double Hypo
Extremely high group damage alongside continuous fire DoT. Double Hypo may require two stack points or a specific split; the transcript does not establish a confirmed setup.
Important: 10-player or 9-player soak?
In the shown run, the group appears to stack for Hypo. The creator asks whether the aggro tank should instead remain out: 10 players split the damage across more people, but the boss may target the full group immediately afterwards. 9 players may take more damage per person. Choose the guild strategy only after testing both.
Boss dead center. Two potions. Then burst.
Even minor mispositioning or a delayed potion can fail the transition.
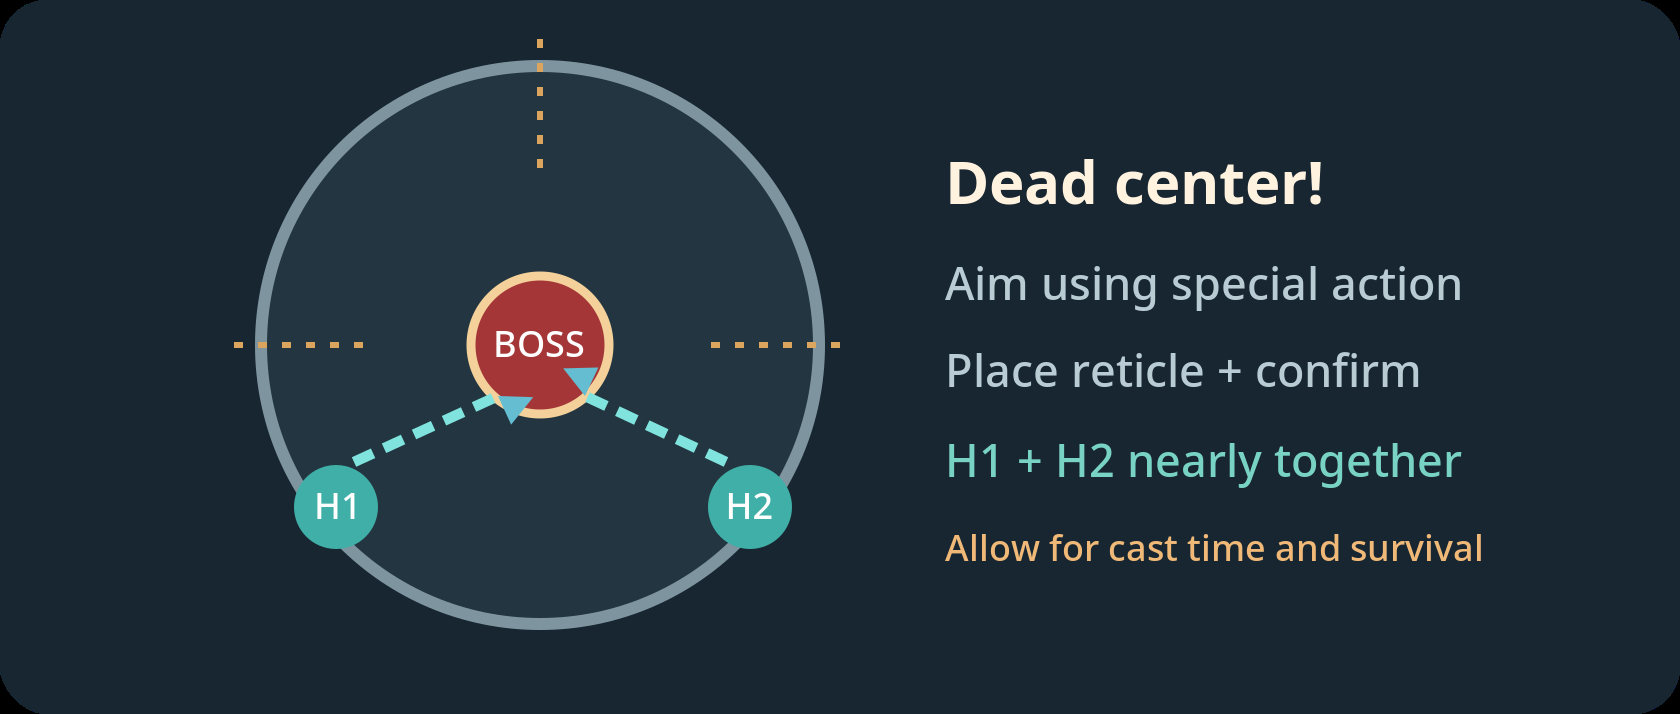
What if the boss isn't centered?
If Grathmok falls too close to the edge, he may stand up again and wipe the group. His placement is therefore the aggro tank's responsibility, not an optional optimization.
Sequence for both healers
- At ~10% HP, Grathmok becomes immune and adds appear.
- Both healers receive an extra potion action (exact timing and relationship to adds unconfirmed).
- On PlayStation, probably X to activate. Place the targeting circle precisely on the boss and confirm again.
- Almost simultaneously throw the potions. Allow for the animation; dying during it wastes the attempt.
- When both hit, the boss falls and becomes vulnerable again with around 30% HP .
Immediately afterwards
Burn the boss down and destroy the rim mechanisms ("locks") during the short damage window. Avoid the middle! Players can fall there. Run around the outside to the objectives.
Red transition: tank channel or team wipe
The DPS check is followed by a critical defensive sequence. Phase 3 adds Madness.
Tank special action
- A period of severe damage over time begins after the successful knockdown.
- As Grathmok reappears and the arena turns red, the tanks gain the relevant special ability.
- Activate the ability and keep holding the buttonuntil the attack ends.
- Healers continuously sustain the group throughout.
Mistimed activation causes a full team wipe according to the preview.
Specific role assignments
Tank 1: Boss placement and aggro. Tank 2: Tankbuster swaps and defensive readiness. Healers: Potions and sustained healing during intermission. DPS: Adds, locks and DPS checks; avoid the center and open vents.
Phase 3: Madness stacks
Purple flame icon in the debuff bar. Stacks cause additional damage; the player dies at 16 according to the preview. Their source is not established.
Creator's theory: hits from boss attacks, especially on tanks. An earlier tank swap might allow stacks to expire. Verify in a guild run before relying on it.
Visibility / technical note
The creator reports that lowering graphics quality removed a strong purple screen overlay. If it obscures the fight, try reducing graphics settings.
Group mitigation before personal DPS
These are ideas from the video, not a verified best-in-slot list.
| Category | Preview recommendation | Status |
|---|---|---|
| Group composition | 2 tanks / 2 healers / 6 DPS | Baseline |
| Support mounts | Around four suitable group support powers; Anglerfish may help debuff boss damage and Combat Advantage. | To test |
| Artifacts | Damage-reducing debuffs; e.g. Paladin's Sigil, Tiamat's Orb, Wyvern variants (verify in-game names). | To test |
| Tank artifact set | Floating Orb set: allegedly 5% group damage reduction with a suitable daily power; difficult to obtain. | To test |
| Active companion | Damage-reducing companions; Guardian Angel as a situational RNG option. | To test |
| Passive bonuses | Eladrin (troll resistance), Lich; alternatively a Raptor granting Awareness, or Portobello da Vinci (Combat Advantage debuff). | To test |
| Overloads | Troll Protection for healers; other defensive overloads to suit the build. | To test |
| Boons | Guild boon mitigating resurrection sickness; rank 2 potion/healing boon for a chance at passive healing. | To test |
Specifically discouraged
"Survivalist's Expertise" is not recommended in the video because it reportedly increases resurrection sickness. Check both the effect and its name in your client.
Other preview ideas
Defensive combat enchantment ("Shattered Resolve"; verify exact name), mount power "Forewarning", Lionheart, "Protector's Spirit", "Ally's Resilience" and extra maximum HP.
Some percentages are item- or rank-dependent and have not been verified against live balance.
Suggested priorities
- Learn the mechanics and callouts.
- Survive Hypo and tankbusters consistently.
- Coordinate mitigation across all 10 players.
- Optimize the DPS check only after that.
Short callouts and assignments for the first guild run
Shared terminology reduces unnecessary movement and makes mistakes easier to diagnose.
Suggested callout glossary
| Callout | Response |
|---|---|
| "Between vents" | Move to the default position. |
| "Three waves" | Wait for the inner wave; dodge toward boss. |
| "Clap – vents" | Check smoke and open covers. |
| "Cleanse" | Use an icy cover to remove fire DoT. |
| "Single buster – swap" | Second tank takes over immediately. |
| "Hypo – ice – mitigate" | Stack on the assigned point with cooldowns. |
| "Center – healers ready" | Center boss precisely; synchronize H1/H2. |
| "Outside – locks" | Avoid center; destroy the mechanisms. |
| "Red – tanks hold!" | Channel protection; healers sustain everyone. |
Pre-pull checklist
- 10 players: 2 tanks, 2 healers, 6 DPS.
- Main tank and off-tank clearly assigned.
- Primary and fallback Hypo positions agreed.
- Damage reduction and healing cooldowns assigned.
- H1/H2 ready for synchronized potions.
- A caller assigned for locks and DPS window.
- Record Madness stacks during phase 3.
Test log after the first run
Check: 9 vs 10 player soak, double Hypo split, source of purple stacks, tolerance of boss centering, potion timing relative to adds, damage/HP requirements, PS5 controls and actual debuff effectiveness.